CM-Cabinets Library User Guide
The Layer button on the Mach.General > Tool page allows you view and/or modify the Layer Table.

Layer Button - Click to Expand
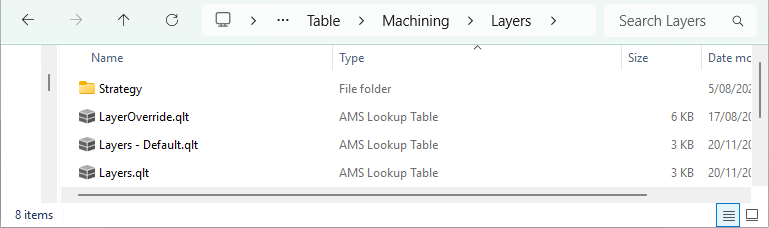
Table Location
All users have access to the Layer Table (Layers.qlt) which can be used to customise layer names (Use Layer Strategies is disabled
).
However, if the Use Layer Strategies is enabled
, then Layer Names will be used by the CabMaster application to lookup the Override table (LayerOverride.qlt).
The default is for the Use Layer Strategies option to be disabled on the Mach.General > Const2 page, which only allows access to one (1) table i.e. the Layer Table Properties (Layers.qlt) which can be used to customise layer names.
Access to all three (3) tables i.e. the Strategy, Override and Layer Tables, is launched only if the Use Layer Strategies option is enabled as shown. The Layer Names will alternatively be used by the CabMaster application to lookup the Override table (LayerOverride.qlt).

Drawing Properties : Mach. General > Const2 page - Click to Expand
It is strongly advised to contact our CabMaster Support Team to assist you to make the required changes.
All users have access to the Layer Table (Layers.qlt). The only difference is what the table is used to accomplish - see above note.
The image below shows access to all three tables, by the use of a category tree, but the default is a single property sheet.
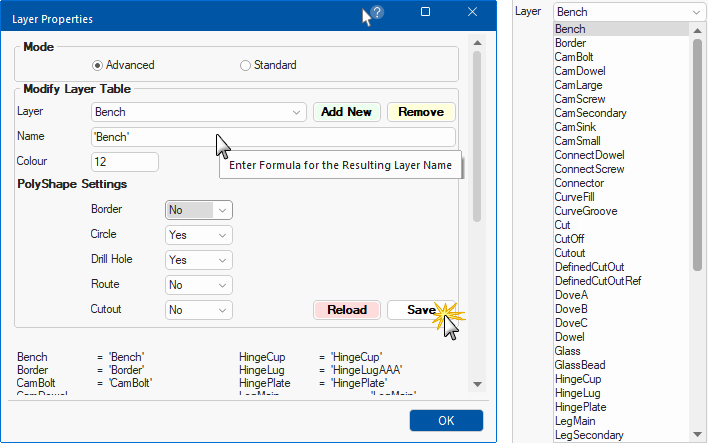
There are two Modes of operation available ...

Layer Table Form - Click to Expand
| Option | Detail |
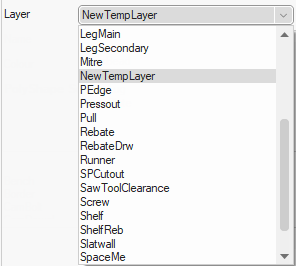
| Layer | The drop list is populated from the Layers Table |
| Name |
Any string needs to be quoted (for example enter 'Bench', rather than just Bench) because, when used, the Name is evaluated as a CabMaster formula. The quotes around the Names (when used) stored in the Layers Table are required to cater for the use of Formulas in the name. In CabMaster terms this makes each entry a formula even if it is just a fixed name. |
| Colour | The colour used in the DXF (normally unused by machining but very helpful for viewing). |
| Polyshape Settings |
Use Yes or No |
A series of Property additions, modifications and removals can be reset by pressing the Reload button before saving.
The Reload and Save buttons are only made available when the changes are made on the property sheet.
The following instructions are only applicable when in Advanced mode.
- Select the relevant Layer name from the drop list (populated from the Layers Table);
- Adjust any necessary details;
- Name : remember any string needs to be quoted (for example enter 'Bench', rather than just Bench)'
- Colour : This number refers to the colour used in the DXFs for viewing;
- PolyShape Settings: Yes or No.
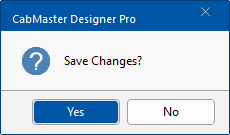
- Press on the 'Save' button;
- Confirm the modifications are to be saved.
The modification can be reset by pressing the Reload before saving.
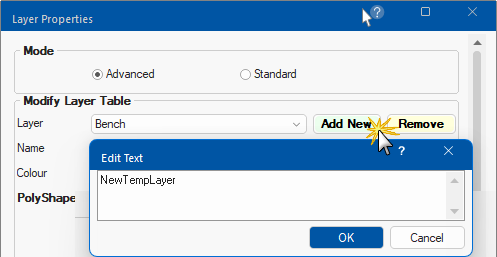
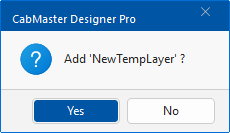
- Press the 'Add New' button;
- In the provided Edit Text box, type in a Layer name that does not already exist;
- Confirm the Layer is to be added;
- Adjust any necessary details;
- Press on the 'Save' button;
- Confirm the additions are to be saved.
This will add the new Layer name to the drop list...
- Select the Layer name to remove from the drop list;
- Press the 'Remove' button to the right of the chosen Layer;
- Confirm the removal.
<your CabMaster Folder>\Table\Machining\Layers\Layers.qlt
Layers.qlt
Example of Layers table.
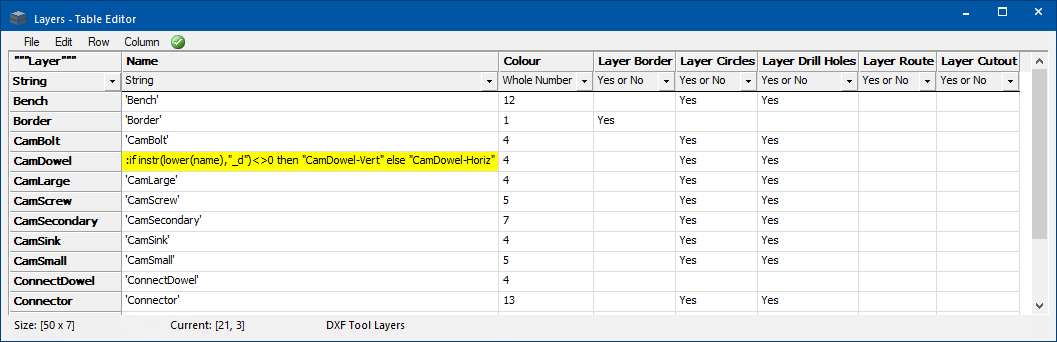
This table contains Layer Name calculation formulas for each commonly used layer. This table has traditionally been used by CabMaster Software™ to allow users to customise layer names.
However, if the registry setting DXTasXML=7, the application will now use the Layer Names calculated from here and are used by the application to lookup the Override table.
The only notable difference to the default CabMaster Layers table (certainly for BiesseWorks®) is that the 'Border' layer is changed to 'Border1|Border2'.